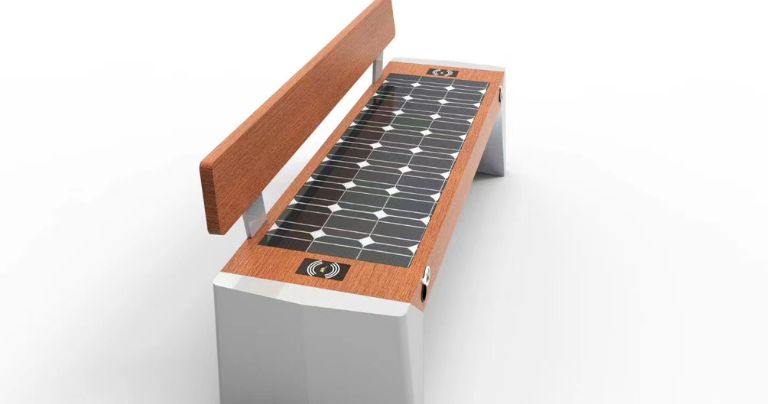
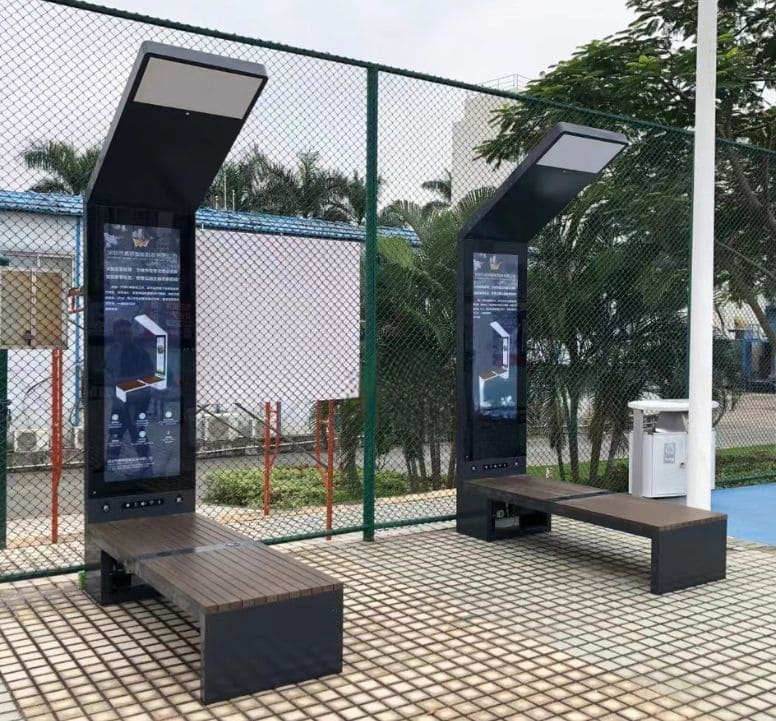
In my years of experience in municipal engineering equipment procurement, I’ve seen the transformative impact of integrating solar technology into public spaces. Solar benches are more than just a place to sit; they’re a statement of sustainable innovation. But how do you ensure they are set up and maintained to deliver their full potential?
To properly install and maintain solar benches, it’s essential to follow a systematic approach. This includes careful unpacking, correct assembly, precise positioning, and diligent upkeep. I will walk you through these critical steps, ensuring that your solar benches serve as a reliable, long-term investment.
As an expert in the field, I understand the importance of keeping the reader engaged. So, let’s delve into the intricacies of solar bench technology and its upkeep.
What Are the Initial Steps to Take When Installing Your Solar Bench?
Embarking on the installation of your solar bench is an exciting venture. It signifies not just a step towards modernizing your space but also a commitment to sustainability. The process, while straightforward, requires attention to detail to ensure that your solar bench operates at its peak performance from the get-go.
Unpacking Your Solar Bench
The first step is to carefully unpack your solar bench. It’s essential to handle each component with care to prevent any damage. As you unpack:
- Check for Completeness: Ensure that all parts listed in the manual are present. Missing components can lead to operational inefficiencies or even prevent the bench from functioning altogether.
- Inspect for Damage: Examine each part for any signs of damage incurred during shipping. Any cracks or dents can affect the structural integrity and the bench’s ability to harness solar power effectively.
Assembling the Structure
Once you’ve confirmed that all parts are accounted for and undamaged, the assembly can commence. This is a critical phase where precision is key:
- Follow the Manual: Use the instruction manual as your bible. It contains specific details on how to fit each piece together correctly.
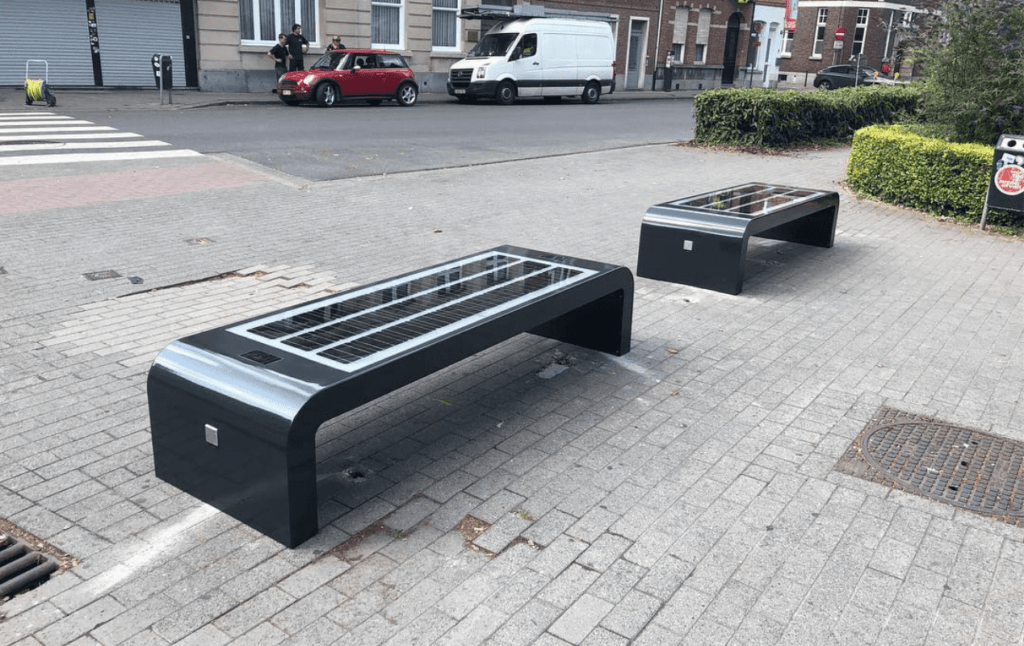
- Secure the Solar Panel: The solar panel is the heart of the bench. It needs to be attached firmly to avoid any dislodgment that could lead to inefficiencies in charging or potential damage.
Optimizing for Efficiency
With the bench assembled, it’s time to optimize it for maximum solar absorption:
- Level the Panel: A level panel ensures that it can absorb the maximum amount of sunlight. Use a spirit level to check that the panel is perfectly horizontal.
- Choose the Right Location: Position the bench in a spot where it receives ample sunlight throughout the day. Avoid shaded areas that could hinder the solar charging process.
Final Checks Before Use
Before the bench is ready for public use, a few final checks are necessary:
- Tighten All Bolts: Go over all the connections once more to ensure everything is tightened and secure.
- Clean the Panel Surface: Wipe down the solar panel to remove any dust or debris that may have settled during the installation process.
By meticulously following these steps, you can rest assured that your solar bench is installed correctly and ready for efficient operation. This attention to detail not only ensures optimal performance but also extends the life of your investment, allowing you to reap the benefits of solar power for years to come.
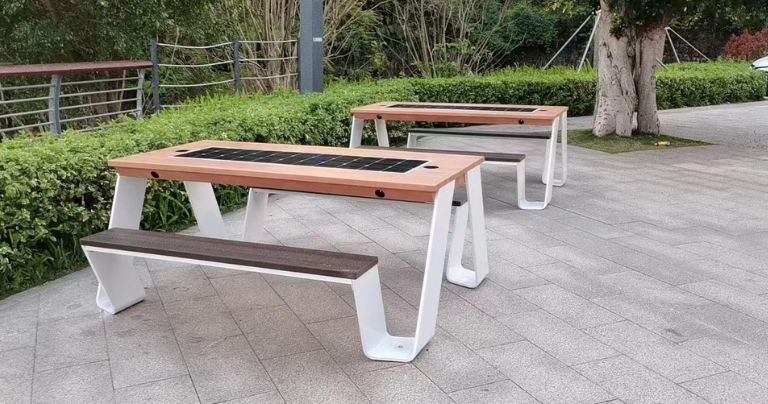
How Do You Optimize the Charging Process for Your Solar Bench?
Optimizing the charging process for your solar bench is a pivotal step in ensuring that your smart benches deliver their full potential. A well-charged solar bench not only provides consistent service but also extends the battery life, reducing the need for frequent maintenance.
Ensuring Proper Cable Connection
The first order of business is to establish a secure connection between the solar panel and the bench’s power system:
- Check the Connections: Verify that all cables are correctly connected according to the installation manual. A loose connection can lead to power loss and inefficient charging.
- Protect the Cables: Ensure that the cables are neatly tucked away and protected from the elements to prevent wear and tear.
Maximizing Solar Panel Exposure
With the cables in place, the next step is to adjust the solar panel for optimal sun exposure:
- Find the Perfect Angle: The angle at which the solar panel is positioned can significantly affect its ability to capture sunlight. Adjust the panel throughout the year as the sun’s position changes.
- Avoid Shade: Regularly observe the area around your solar bench to ensure that new obstructions, like growing trees or newly constructed structures, do not cast a shadow on the panel.

Monitoring and Adjusting
The optimization of your solar bench’s charging capability is an ongoing task:
- Regular Monitoring: Keep an eye on the charging speed and battery levels to gauge the effectiveness of your current setup.
- Seasonal Adjustments: Be prepared to make adjustments for seasonal changes. The sun’s path changes throughout the year, and so should the orientation of your solar panel.
Maintaining the Solar Panel
A clean solar panel is a more efficient solar panel:
- Routine Cleaning: Dust and debris can block sunlight. Clean the panel regularly to ensure it’s absorbing as much sunlight as possible.
- Inspection for Damage: Look for any damage to the panel that might affect its performance. Prompt repairs can prevent further issues.
By following these steps, you can optimize the charging process of your solar bench, ensuring that it remains a reliable and sustainable feature in your public space. Regular attention and adjustments will keep the bench serving the community effectively, offering a place of rest and recharge for both people and their devices.
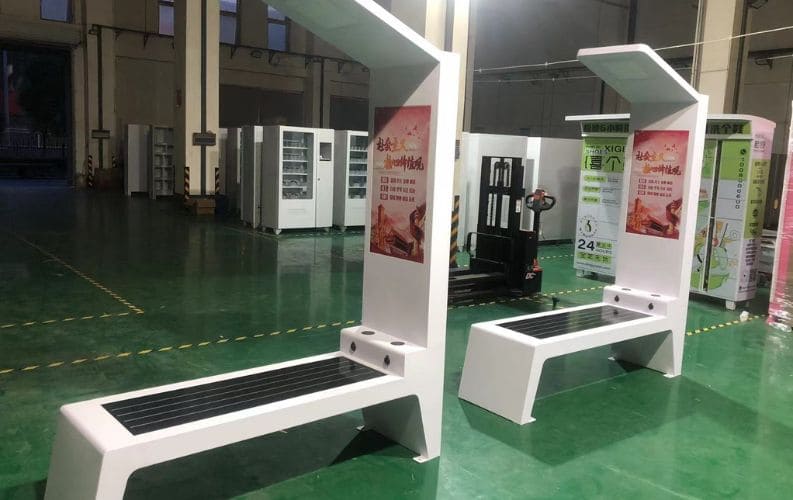
What Are the Best Practices for Using Your Solar Bench?
Utilizing your solar bench effectively is not just about providing a service; it’s about enhancing the user experience. To ensure that visitors can enjoy the full benefits of this innovative amenity, it’s important to adhere to certain best practices.
Facilitating Efficient USB Charging
For those needing a quick power boost via a wired connection, the solar bench’s USB charging feature is invaluable:
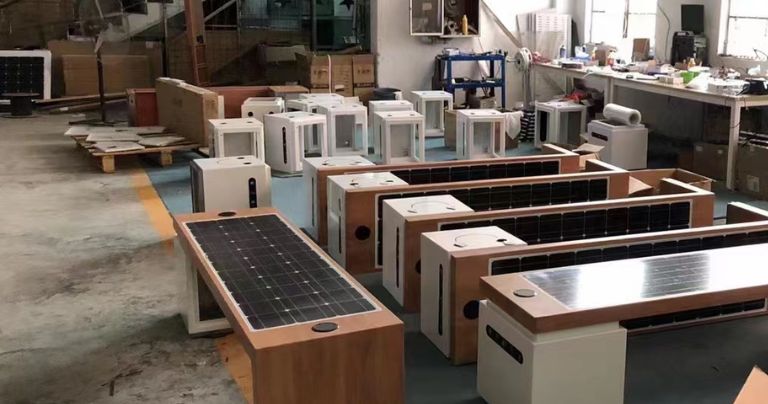
- Waterproof Cover Handling: Carefully open the waterproof cover to access the USB port. This cover is essential for protecting the electronic components from moisture and debris.
- Secure Cable Connection: Insert the USB cable firmly into the port to establish a stable connection for efficient charging.
Maximizing Wireless Charging Efficiency
Wireless charging is a convenient feature for users, and to make the most of it:
- Correct Placement: Position the device in the center of the wireless charging pad. Proper alignment is crucial for the initiation and maintenance of the charging process.
- Wait for Confirmation: After placing the device on the pad, wait for the indication that charging has begun, usually signified by a light or a sound.
Ensuring Optimal Bench Usage
To keep the solar bench operating at its best, users should also be mindful of the following:
- Device Compatibility: Before attempting to charge, ensure that your device is compatible with the bench’s charging standards.
- Mindful Usage: While the bench is designed for durability, it’s still important to treat it with care. Avoid placing heavy objects on the charging panels and keep the area clean.
Regular User Education
Informing users about how to use the solar bench correctly can greatly enhance its longevity and functionality:
- Clear Instructions: Display user-friendly instructions nearby to assist first-time users in taking advantage of the bench’s features.
- Feedback Encouragement: Encourage users to provide feedback on their charging experience. This can help identify any issues with the bench and improve the service.
By following these best practices, you ensure that your solar bench remains a reliable and convenient charging station for all users. Regular usage according to these guidelines will help maintain the bench’s condition and ensure that it continues to serve as a testament to sustainable innovation in public spaces.

How Can You Seamlessly Integrate Bluetooth Connectivity with Your Solar Bench?
Incorporating Bluetooth technology into your solar bench is a step towards modernizing public spaces with smart, connected amenities. To ensure a seamless integration, it’s important to understand the straightforward process of connecting devices and enjoying the features that Bluetooth enables.
Initiating Bluetooth Pairing
The process begins with establishing a connection between the user’s device and the solar bench:
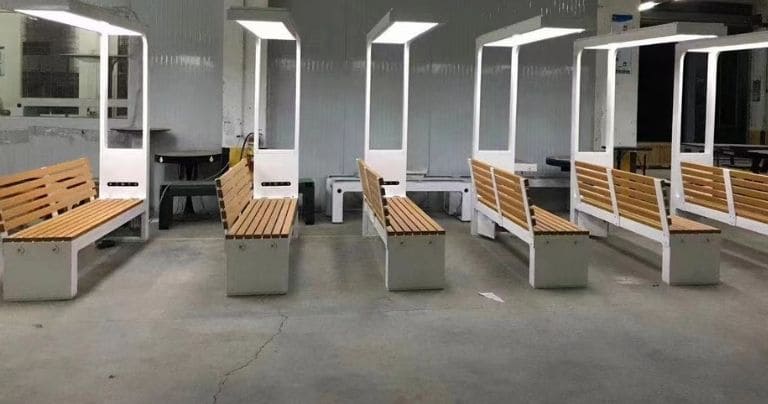
- Enable Bluetooth: On your device, turn on Bluetooth and scan for new devices within range.
- Select ‘SolaraNook’: Look for the ‘SolaraNook’ network in the list of available devices and select it to initiate pairing.
Successful Connection Confirmation
Once you select ‘SolaraNook‘, the device will attempt to connect:
- Wait for the Prompt: Your device will confirm when the connection is successful, often with an audio prompt or a visual cue on the screen.
- Troubleshooting: If the connection fails, ensure you’re within the effective range and that the bench is not already connected to another device.
Enjoying Bluetooth Features
With a successful connection, you can now enjoy the features that the Bluetooth-enabled solar bench offers:
- Music Playback: Select your favorite music and play it through the bench’s speakers, creating an ambient atmosphere for relaxation.
- Hands-Free Calls: If the bench supports it, you can also manage phone calls, providing convenience and maintaining privacy in public spaces.
Maintaining the Connection
To keep the Bluetooth connection stable and reliable:
- Stay Within Range: Bluetooth has a limited range, usually around 10 meters (33 feet), so stay within this distance to maintain the connection.
- Minimize Interference: Other electronic devices and obstacles can interfere with Bluetooth signals. Try to minimize these for the best experience.
By following these steps, you can effortlessly integrate Bluetooth connectivity with your solar bench, enhancing the user experience with wireless technology. This not only adds value to the bench but also promotes a tech-savvy image for the public space it occupies.
How Do You Store and Transport Your Solar Bench Safely?
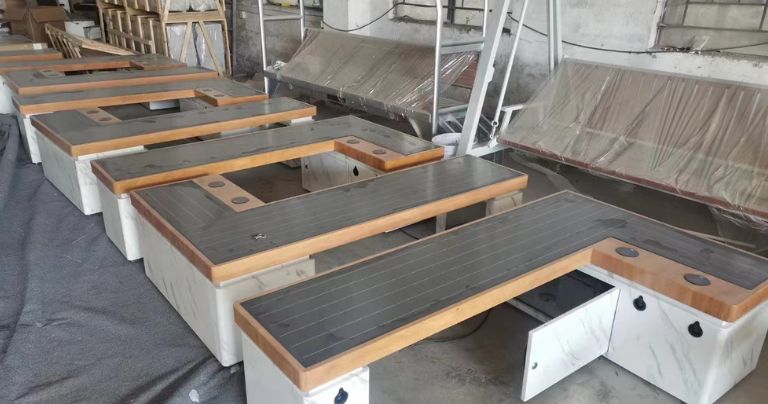
Storing and transporting your solar bench safely is crucial to preserving its functionality and aesthetic appeal. Whether you’re moving it to a new location or storing it for the season, proper handling is key to avoiding damage.
Preparing for Storage
When the bench is not in use, especially during long periods of inactivity, it’s important to store it correctly:
- Clean Before Storing: Ensure that the bench is clean and dry before storage. This prevents mold, rust, and other forms of corrosion.
- Choose an Appropriate Location: Store the bench in a dry, cool place away from direct sunlight or extreme temperatures that could degrade its components.
Securing the Bench for Transportation
If you need to transport your solar bench, taking the right precautions can prevent damage:
- Disassemble if Necessary: If possible, disassemble the bench to its core components. This reduces the risk of damage during transport.
- Use Protective Coverings: Wrap the components in protective materials, such as bubble wrap or blankets, to cushion against shocks and vibrations.

Handling with Care
During both storage and transportation, handle the bench with care:
- Lift Properly: Always lift the bench using the correct technique to avoid injury and prevent dropping it.
- Avoid Stacking: When storing or transporting, do not stack heavy items on top of the bench as this could lead to structural damage.
Maintaining Ideal Conditions
Whether in storage or transit, the conditions in which the bench is kept can affect its longevity:
- Controlled Environment: Aim for a temperature-controlled environment to prevent battery and material degradation.
- Avoid Moisture: Keep the bench in a moisture-free environment to prevent electrical and metal components from deteriorating.
By adhering to these storage and transportation guidelines, you can ensure that your solar bench remains in prime condition, ready to provide sustainable energy and convenience wherever it’s placed. Proper care in these stages reflects the overall quality and reliability of the service you provide to your users.
How Do You Store and Transport Your Solar Bench Safely?
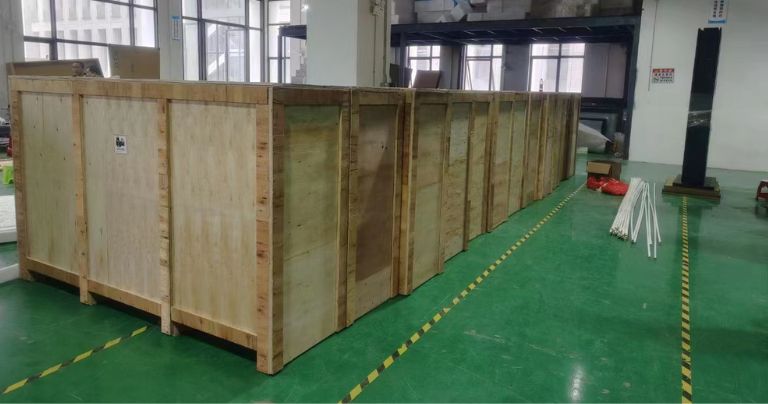
Ensuring the safe storage and transportation of your solar bench is paramount to maintaining its condition and functionality. Whether you’re moving it to a new location or safeguarding it during off-seasons, the right approach is essential.
Strategic Storage Solutions
When your solar bench is not in active use, it’s crucial to store it properly:
- Dry and Ventilated Space: Choose a storage area that is dry and well-ventilated to prevent moisture accumulation, which can lead to rust and deterioration of electronic components.
- Away from Sunlight: Although designed for the outdoors, prolonged exposure to sunlight can degrade the materials when not in use. Store the bench in a shaded area to prolong its lifespan.
Careful Transportation Handling
Transporting your solar bench requires attention to detail to avoid damage:
- Secure Packing: If the bench is to be transported, ensure it is securely packed. Use padding materials to protect it from bumps and scrapes during the move.
- Gentle Loading and Unloading: Always lift and carry the bench with care, avoiding any rough handling that could damage the solar panels or structural integrity.
Maintaining Condition During Transit
The condition of your solar bench during transit can affect its performance:
- Stable Positioning: Make sure the bench is positioned in a stable manner in the transport vehicle to prevent it from sliding or toppling over.
- Temperature Control: Extreme temperatures can affect the battery and other sensitive components. Try to maintain a moderate temperature during transportation.
Post-Transport Inspection
After transporting your solar bench, a thorough inspection is necessary:
- Check for Damage: Inspect the bench for any signs of damage that might have occurred during transit.
- Functional Test: Before reinstalling the bench at its new location, perform a functional test to ensure everything is working as it should.
By following these guidelines, you can store and transport your solar bench safely, ensuring that it continues to provide eco-friendly energy and a comfortable resting place for users for years to come. Proper care during these processes reflects the high standards and reliability of your product and service.
Conclusion
In adhering to the outlined best practices, you’ll be equipped to effectively install, operate, and uphold your solar benches, thereby delivering a reliable and eco-conscious amenity for communal areas.

